More Zipper Pouches!

Zipper Pouches - www.hoorayforrain.com

If making zipper pouches is wrong, I don't wanna be right! I made three more...two for a friend and one for me!

Zipper Pouches - www.hoorayforrain.com

Zipper pouches are a high reward project because they come together so quickly and make great gifts.

Newsflash: when you make three at once, they come together even quicker! 

Zipper Pouches - www.hoorayforrain.com

Honestly, the only reason I stopped at three was that I ran out of zippers. :)

Easter Bunny Tutorial

Easter Bunny Tutorial - www.hoorayforrain.com

Little bunnies are multiplying in my craft room! In preparation for Easter I have been making bunnies for some of the kiddos in my life. This attachment has all of the template pieces needed to make a bunny of your own. This pattern is a tweaked version of my rabbit softie pattern, which makes a shorter, chubbier bunny. 

Easter Bunny Tutorial - www.hoorayforrain.com

First things first, I cut all my pattern pieces out. I traced the templates onto my fabric with a disappearing ink pen. I also tried tracing with chalk and my Frixion pen, but due to the stretchiness of the jersey, the disappearing ink pen worked best. I traced and cut out the following pieces:

  • two head pieces 
  • four ear pieces
  • two body pieces
  • four arm pieces
  • four leg pieces

The first pieces I sewed together are the ears. I sewed two pieces together with a scant quarter-inch seam, turned them right side in, and then topstitched an eighth of an inch or less from the edges. 

Easter Bunny Tutorial - www.hoorayforrain.com

Then, in preparation for embroidering the rabbit's face, I sewed the ears on to one of the head pieces, aligning the base of the ears with the top of the front of the face, and taking just a few stitches to hold them in place. Then I drew on the face with the disappearing ink pen, and embroidered the face.

Easter Bunny Tutorial - www.hoorayforrain.com

Next, I sewed the arms and legs together, leaving the base of each appendage open. I use the same pattern piece for the arms and the legs. Here's one of the arm/leg pieces in all the stages from cut pattern pieces to stuffed arm/leg. 

Easter Bunny Tutorial - www.hoorayforrain.com

Then I attached the body pieces to the head pieces.

Easter Bunny Tutorial - www.hoorayforrain.com

Then it was time to tack the arms and legs in place. I made sure to position the arms and legs facing in on top of the body when lining up the arm/leg raw edges with the raw edge of the body. Otherwise, when I turned your rabbit right side out, the arms and legs would have been facing the wrong way.

Easter Bunny Tutorial - www.hoorayforrain.com

Then I sewed the head pieces together, right sides facing each other, and ears tucked in. I started and stopped stitching at the head/body junctions. 

Easter Bunny Tutorial - www.hoorayforrain.com

Next I tucked the arms in. I sewed from the head/body junction down just past the armpit of one arm. Then I switched over to the other side of the body, and stitched from the head/body junction down the side. When I got near the bottom of the body, I stuffed the legs inside the body, then stitched around the bottom of the body past both legs. I left an opening between the leg and the armpit to turn the bunny right side out.

Side note...when my dear sister Lauren proofread this post, she compared me to a serial killer for talking about turning poor little bunnies inside out.

Lauren text.png

Seriously guys, I swear I'm not a serial killer of anything. I don't even like to kill real live spiders. I'm just a...serial bunny maker? I've got about 6 of these little guys going right now.

Easter Bunny Tutorial - www.hoorayforrain.com

Serial killer comparisons aside, the next thing I did was turn and stuff the bunny. The last step is to sew up the opening. I like to use a ladder stitch. 

Easter Bunny Tutorial - www.hoorayforrain.com

Hooray, you have one pint-sized Easter Bunny! 

Easter Bunny Tutorial - www.hoorayforrain.com

St. Patrick's Day Snail Mail

St. Patrick's Day is quickly approaching and I've spend the last few weeks creating a snail mail surprise for the special kiddos in my life. The process involved a number of learning experiences, and I'm happy with how they turned out!

At Craft Day I was inspired by rainbow colors, and started playing with my circle and heart punches in all the beautiful hues. 

I tried hole punching and stringing the pieces together, but wasn't happy with the overall effect. Jen encouraged me to try sewing them together for my own paper garland, and guided me through the process. It was much easier than I expected, and I absolutely learned from my mistakes so I know how to make them straighter next time. Hopefully the recipients won't look too closely.

spd7.jpg

Next I started playing with my Silhouette Cameo to make clouds for the top of the rainbow. I was able to teach myself how to use the trace feature to edit and cut out portions of google clip art images.

I wanted to make it obvious which shape to start with to showcase the full burst of colors when the rainbow was pulled out of the box.

I stopped by our local Party City and was able to find the gold coins, black pots, green goodies, and treat boxes thanks to the help of our cousin Brianne.

Here's the full effect in stages.

I also chose to enclose a leprechaun note for each kiddo.

This project was so much fun, and I loved looking at all the rainbow colors. I can't wait to mail them off this week. Next Tuesday, I hope you find a gigantic pot of gold at the end of your rainbow. Have fun celebrating!

Fabric Christmas Lights

Last year, I found this fabulous tutorial for Retro Fabric Christmas Lights, and couldn't wait to make my own.  I have no sewing experience or talent, which is why I tend to stick to paper crafts. Jen was gracious and patient enough to help me sew the light bulb outlines.

Once each of the lights was sewn, I used a pair of tweezers to fold them back to right side out since the opening was so small. I used a knitting needle to stuff each light bulb with polyfill, and chose not to hand sew each one shut. Instead, I used the eraser end of the pencil to tuck the fabric edges back inside with the polyfill, and hot glued a small bead to seal the stuffing and fabric edges. Before the glue dried, I attached the wooden spool and baker's twine per Erin's instructions in the tutorial.

I love that the options for these lights are endless with so many colorful fabrics and baker's twine on the market. The lights are perfect for fabric scraps and are cheerful and useful no matter what pattern you choose. I think it's fabulous that they are so kid-friendly and durable, unlike so many Christmas decorations.

I made a light bulb garland with each light tied on to the baker's twine string in a set pattern, but I also made a few with clothespins so the colors and patterns could be switched out. I tied the leftover lights onto my packages as fun decorations, and to be used as ornaments.

lights10.jpg

Happy Holidays!

The Sweetest Doll Pattern

Hooray for Rain - Sweet Doll Pattern

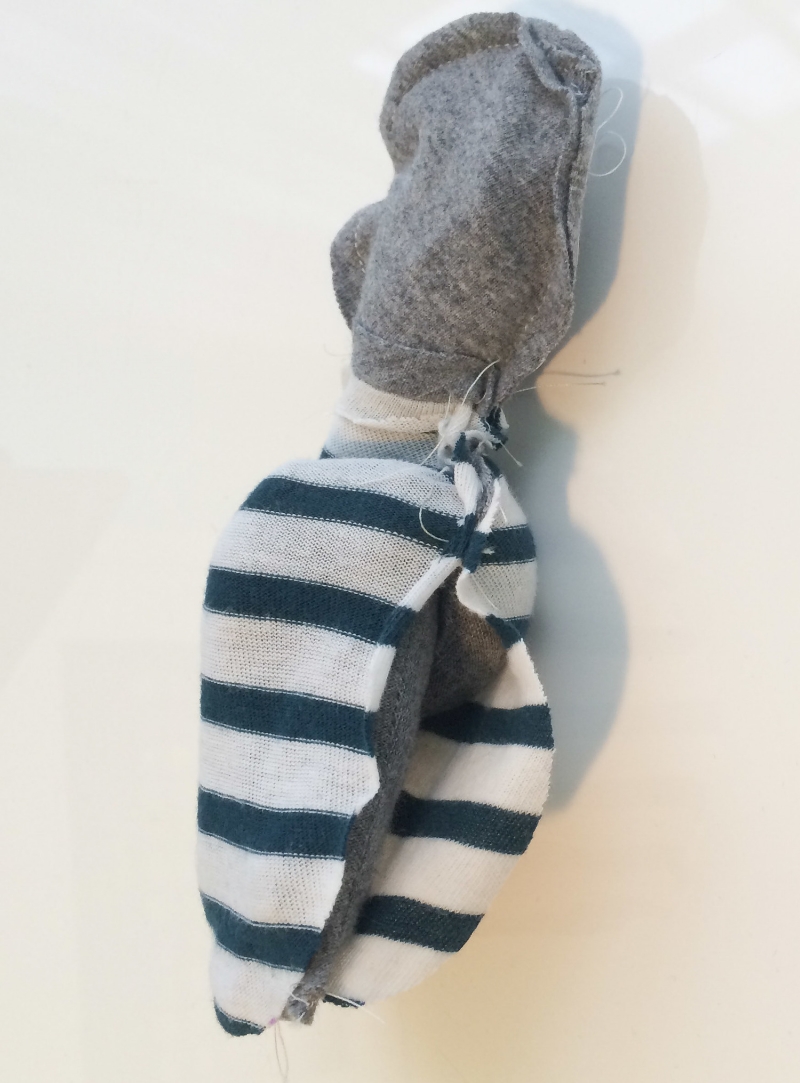
A few years ago, I discovered the sweetest doll pattern over at girlinspired. Stef of girlinspired created several of the dolls for her daughter’s 7th birthday party. The girls got to mix and match their desired hair colors with the doll bodies, and Stef sewed them up at the party. Ingenious!  You can read more about Stef’s process and download the pattern here.

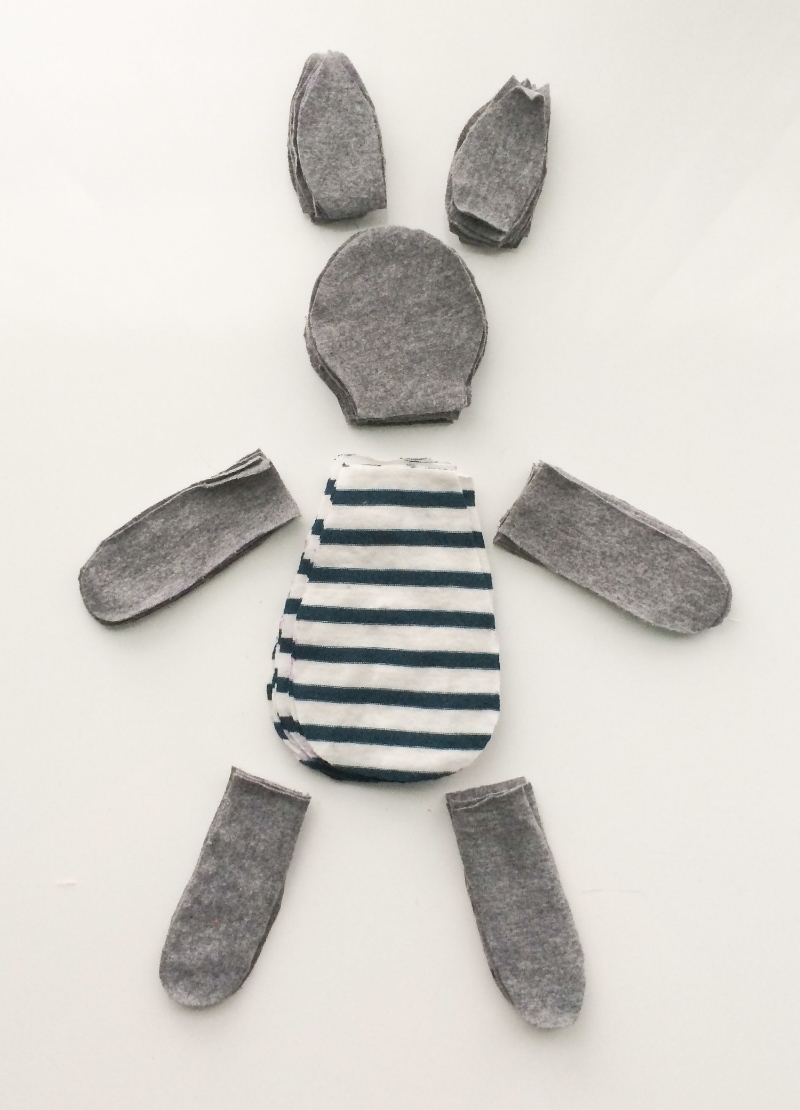
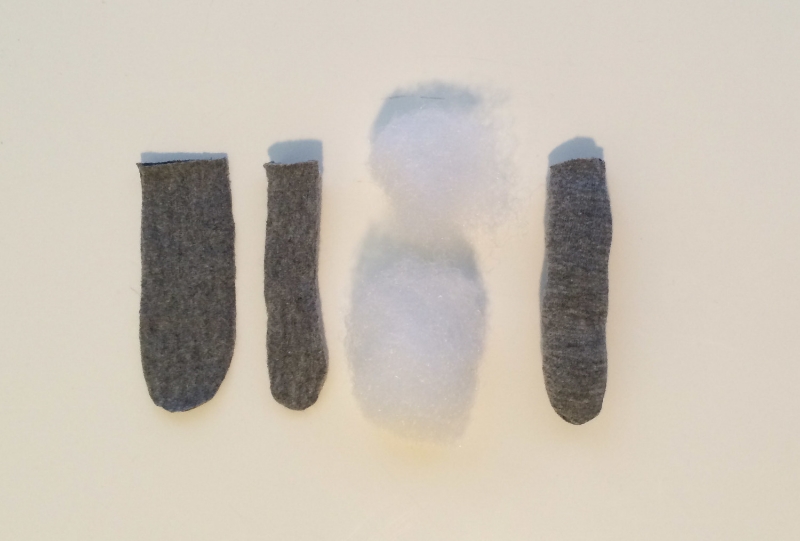
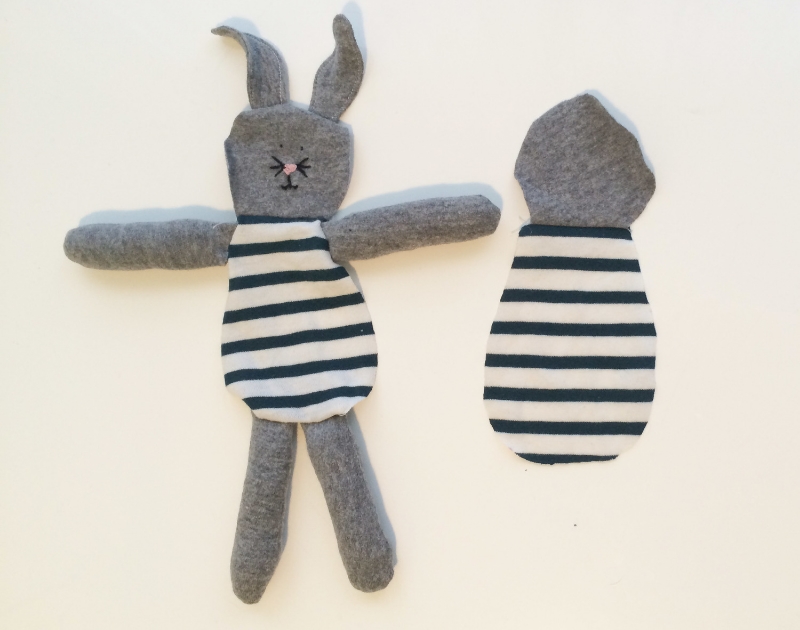
This simple pattern has become one of my favorite gifts for new babies and birthdays. I’ve used this pattern enough that I eventually made template plastic copies of all of the pattern pieces.

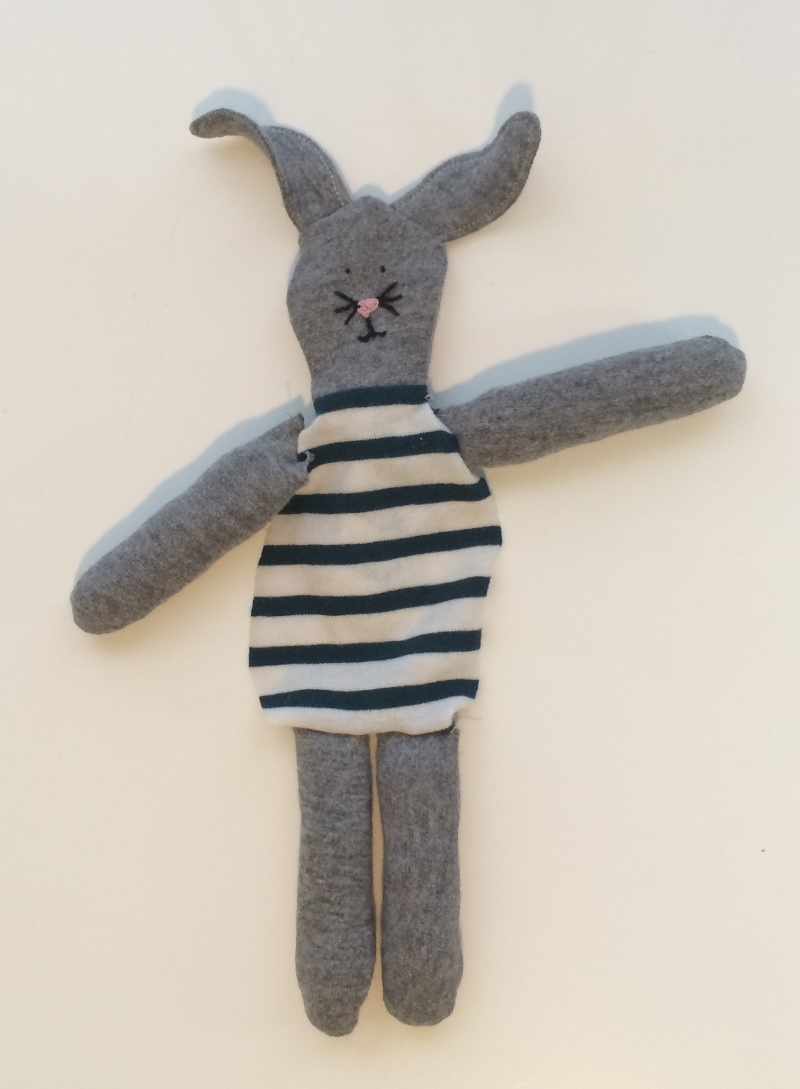
I made the doll in the photo above for the baby daughter of one of my high school friends. Below are photos of some of the other dolls I’ve made from this pattern. I highly recommend this as a fun and confidence-building project for those who have basic sewing skills and are looking for a new challenge!

Hooray for Rain - The Sweetest Doll Pattern
The Sweetest Doll Pattern - Hooray for Rain