Get Well Banner

Recovering from an illness or injury is downright miserable and lonely. The other day, I was looking through an old box and found a sweet get well card, full of crayon drawings of balloons and flowers made by one of Jen's best friends. I had been cooped up for a week with bronchitis in elementary school, and her simple gesture was so meaningful and such a surprise. It's the little things that make you feel better when you're gaining back your strength.

I have a coworker who recently broke her leg, and is very allergic to flowers. Inspired by the many adorable band-aid cards on Pinterest, here was my alternative to a cheerful bouquet...

I started with five 2 inch x 2 inch blue squares. I used the small, dot band aid packaging for the beginning and end of the banner. I secured each square to the next with the adhesive ends of small band aids, and spelled out the message with scrapbook stickers. I spiced up my band-aid friends with some googly eyes and a heart sticker, and finished my banner with baker's twine and red pom poms.

banner2.jpg

I hope this helps to brighten her spirits!

Cyanotype Sun Prints


Hooray for Rain - Cyanotype Sun Prints

Blue has been my favorite color for years and years. I love every shade – pale blue, deep sea blue, and everything in between. At least half of my fabric stash is blue. Naturally, I could not RESIST cyanotype prints, more commonly known today as sun prints, when I first discovered them in an art supply store.

Cyanotype is a photography process that was discovered in the 1800’s. Cyanotype paper is made light sensitive with potassium ferricyanide and ferric ammonium citrate. Some people treat paper or fabric themselves with the chemicals. As a beginner, I happily bought a kit at the art store.

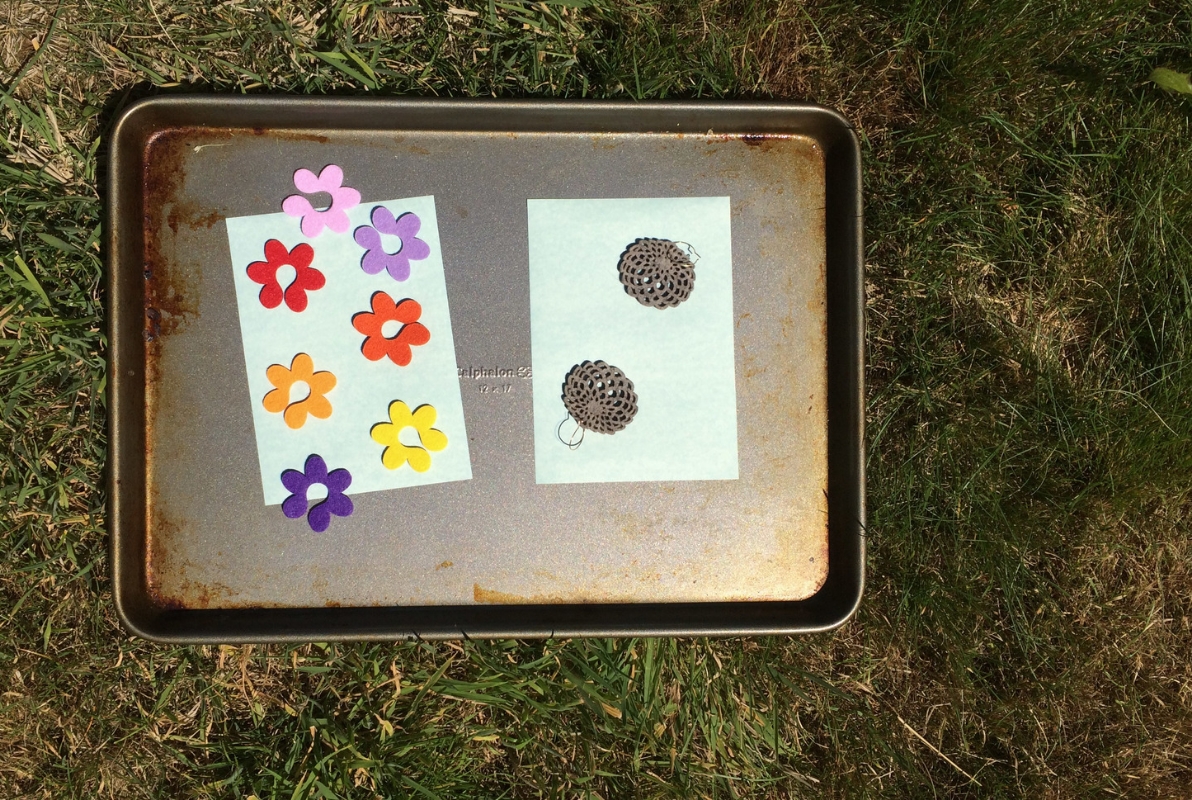
Before you start, you’ll want to gather your objects to place on the light sensitive paper. Pick interesting objects with strong silhouettes. Leaves and flowers work well, but you may find other objects around the house with interesting shapes. I grabbed some laser cut felt dahlia earrings and some felt flower wine glass markers, and both worked well.

Because the paper is light sensitive, you must take the sun print paper out of the envelope inside or in minimal indirect natural light. The paper is medium blue. Arrange your objects on one or two of the sheets, and put them outside in direct sunlight. I arranged my paper and objects on a cookie sheet for ease of transporting into the direct light.

Hooray for Rain - Preparing Sun Prints

Leave your sun prints and objects in direct sunlight for about one minute. The exposed parts of the paper will fade to a very pale blue, which is how you know they are done.

Hooray for Rain - Sun Prints in the Sun

When you remove the objects, there will be medium blue shadows where the objects were.

Hooray for Rain - Sun Prints After Exposure

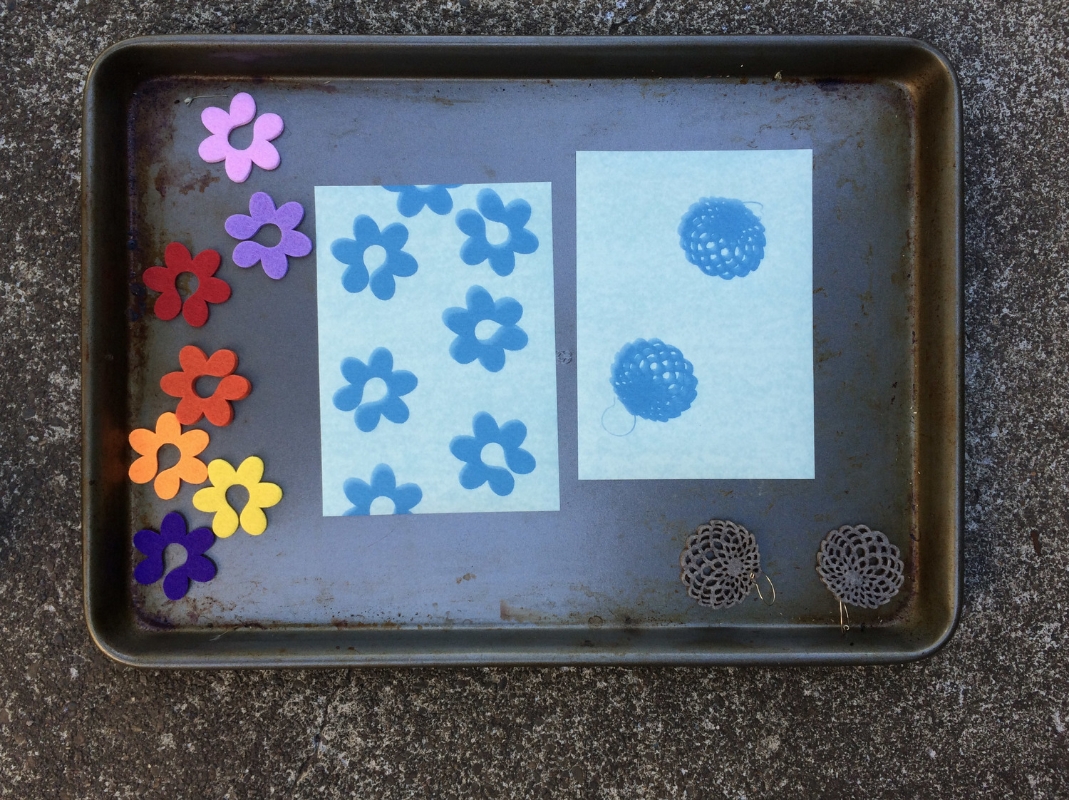
Rinse the paper in water. I used a second rimmed cookie sheet with water in it. Once rinsed in water, the exposed areas will turn blue again, and the areas shadowed by your objects will turn white. It’s a neat effect.

Hooray for Rain - Sun Prints After Water Bath

Place your finished sun prints somewhere flat to dry. I placed rocks on mine to keep them from blowing around. The blue areas will begin to darken immediately. Once your sun prints have dried, place them under a heavy book overnight to flatten. They will continue to deepen in contrast overnight. Such a pretty deep blue!

Consider your objects and whether they would look better exposed to sunlight directly overhead, or angled sunlight, which could create shadows depending on the shapes of your objects.

Here is a sun print that was exposed in mid-day sunlight. I love the effect of my quilting ruler layered over the fern.

Hooray for Rain - Fern Ruler Cyanotype

This one, done in late afternoon sunlight with poppies, turned out pretty cool too. You can see the shadows cast by the poppy petals in a lighter blue above the white flower silhouettes.

Hooray for Rain - Poppy Cyanotype

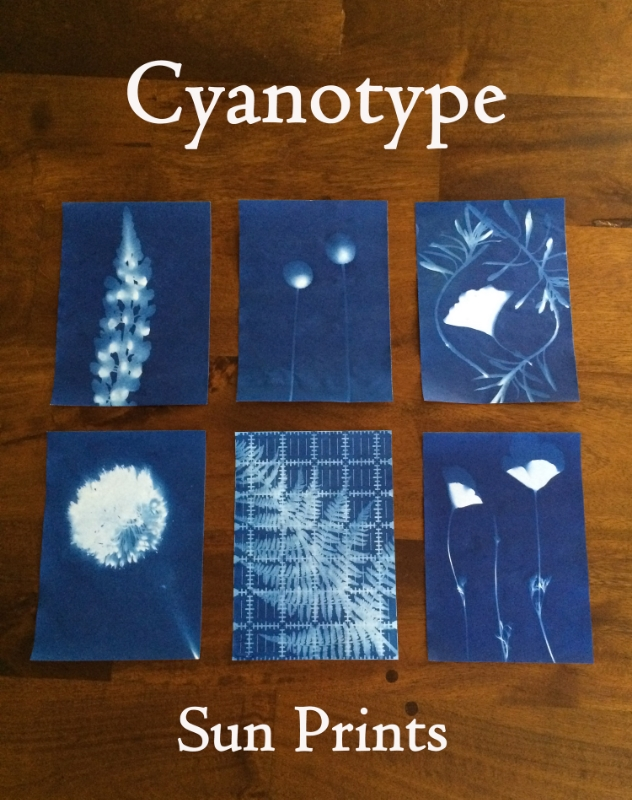
Here’s a collection of a few of my favorites. Clockwise from the top left, they are:

1) lupine

2) billy buttons

3) ginkgo (center) and candytuft leaves (outer)

4) California poppies

5) fern and quilting ruler and

6) leek allium

Hooray for Rain - Cyanotype Sun Prints

I had a great first experience with cyanotype, and I’d recommend the craft for kids and adults alike!

Now I can’t stop thinking about cyanotype fabric…

Birthday Greetings

I adore any opportunity to send or receive any kind of snail mail, especially birthday mail. My mother is the Martha Stewart of remembering and recognizing birthdays, and I'm trying to follow closely in her footsteps. I've been getting tired of the birthday card options at my favorite card stores, and wanted to do something different. My good friend Kelsey celebrated her birthday at the end of July, and I decided to mail her this cheery birthday sign, again inspired by The Paper Mama.

I started with an array of patterned paper, and punched 2 inch circles for my sign.

birthday16.jpg
birthday9.jpg

I used stick-on scrapbook letters to speed up the process.

Recently I ordered a 5 lb package of multicolored pom-poms and have been trying to find ways to utilize them. I've seen a variety of these adorable ice cream cones on Pinterest, and thought they would dress up my sign.

I started with one of my favorite craft supplies -- a toilet paper tube. I unrolled it, and punched a 2 inch circle from it.

I cut the circle into uneven quarters, and rolled and hot glued them to make the cones.

Next, I hot-glued my pom-poms onto the cone to make a double scoop. I used the ice cream cones as spacers between the words. I punched each circle at the top, and threaded the sign with blue baker's twine. I folded the sign into an accordion, put it in a small box, and mailed it off to hopefully, brighten her day!

Bridal Shower in a Box

Boy is it wedding season. I've had a handful of college friends tying the knot this summer, and I haven't been able to attend all of the grand festivities. To honor one of my dear friends, I compiled the bridal shower essentials, and a fun surprise, and mailed the goodies off to arrive a few days before her shower.

Her wedding invitation was a gorgeous combination of melon and sky blue, and I used these colors as inspiration for the hand-made portion of the box. I adore the signs by The Paper Mama, and wanted to make my own version that my friend could use as a decoration at her shower. Here is the finished product.

I chose to make my letter squares 3.5 inches by 3.5 inches because the box meant to hold the sign was 4 x 4 inches. I cut out 11 squares in the sky blue paper and set them aside.

Next, I spelled out the letters in a word document, and experimented with the font size to fit them to the blue squares. Then I cut out the black letter outline and traced them onto the melon colored paper. Having stencils would work well, and save time.

Once the letters were cut out of the melon paper, I attached them to the blue squares with a glue stick. For the ampersand, I chose to use an X-Acto knife rather than scissors. I also used the melon-colored paper to make two large hearts for the beginning and end of the sign. I used a mini hole punch in the upper right and left corners of each square, and threaded blue and white striped baking twine.

sign half done.jpg

Finally, I attached the hearts to the edges of the twine with scotch tape.

I secured the completed sign in a box, taping the first heart to the box top, so the sign could be easily removed without becoming tangled.

sign in box.jpg

I also chose to include a gift card to one of her registry sites, a set of thank you notes, nail polish, and a mini emergency kit with mints, deodorant, a first aid kit, and a few travel size medications.

I wrapped everything in tissue the same color as her invitation, and sent it off with a note on the box to open before the shower.

It was fun to make, and a nice way to celebrate with her from afar!