Adventures With Knits

Sewing with knits - Hooray for Rain

I've had a rocky relationship with knit fabrics. About a year ago, I bought some gorgeous knit fabric and set out to make a pilot cap for a friend's kiddo. The pieces of the hat were supposed to be stitched together with a mock overlock or zigzag stitch. It would be an understatement to say it did not go well.  I ended up with a  horrifying crumple of fabric with a stretched out, jaggedy seam. I managed to laugh instead of cry, but it was close!  I tried the hat again a few months later. It went slightly better that time, but still nowhere near the quality that I would feel good about giving as a gift.

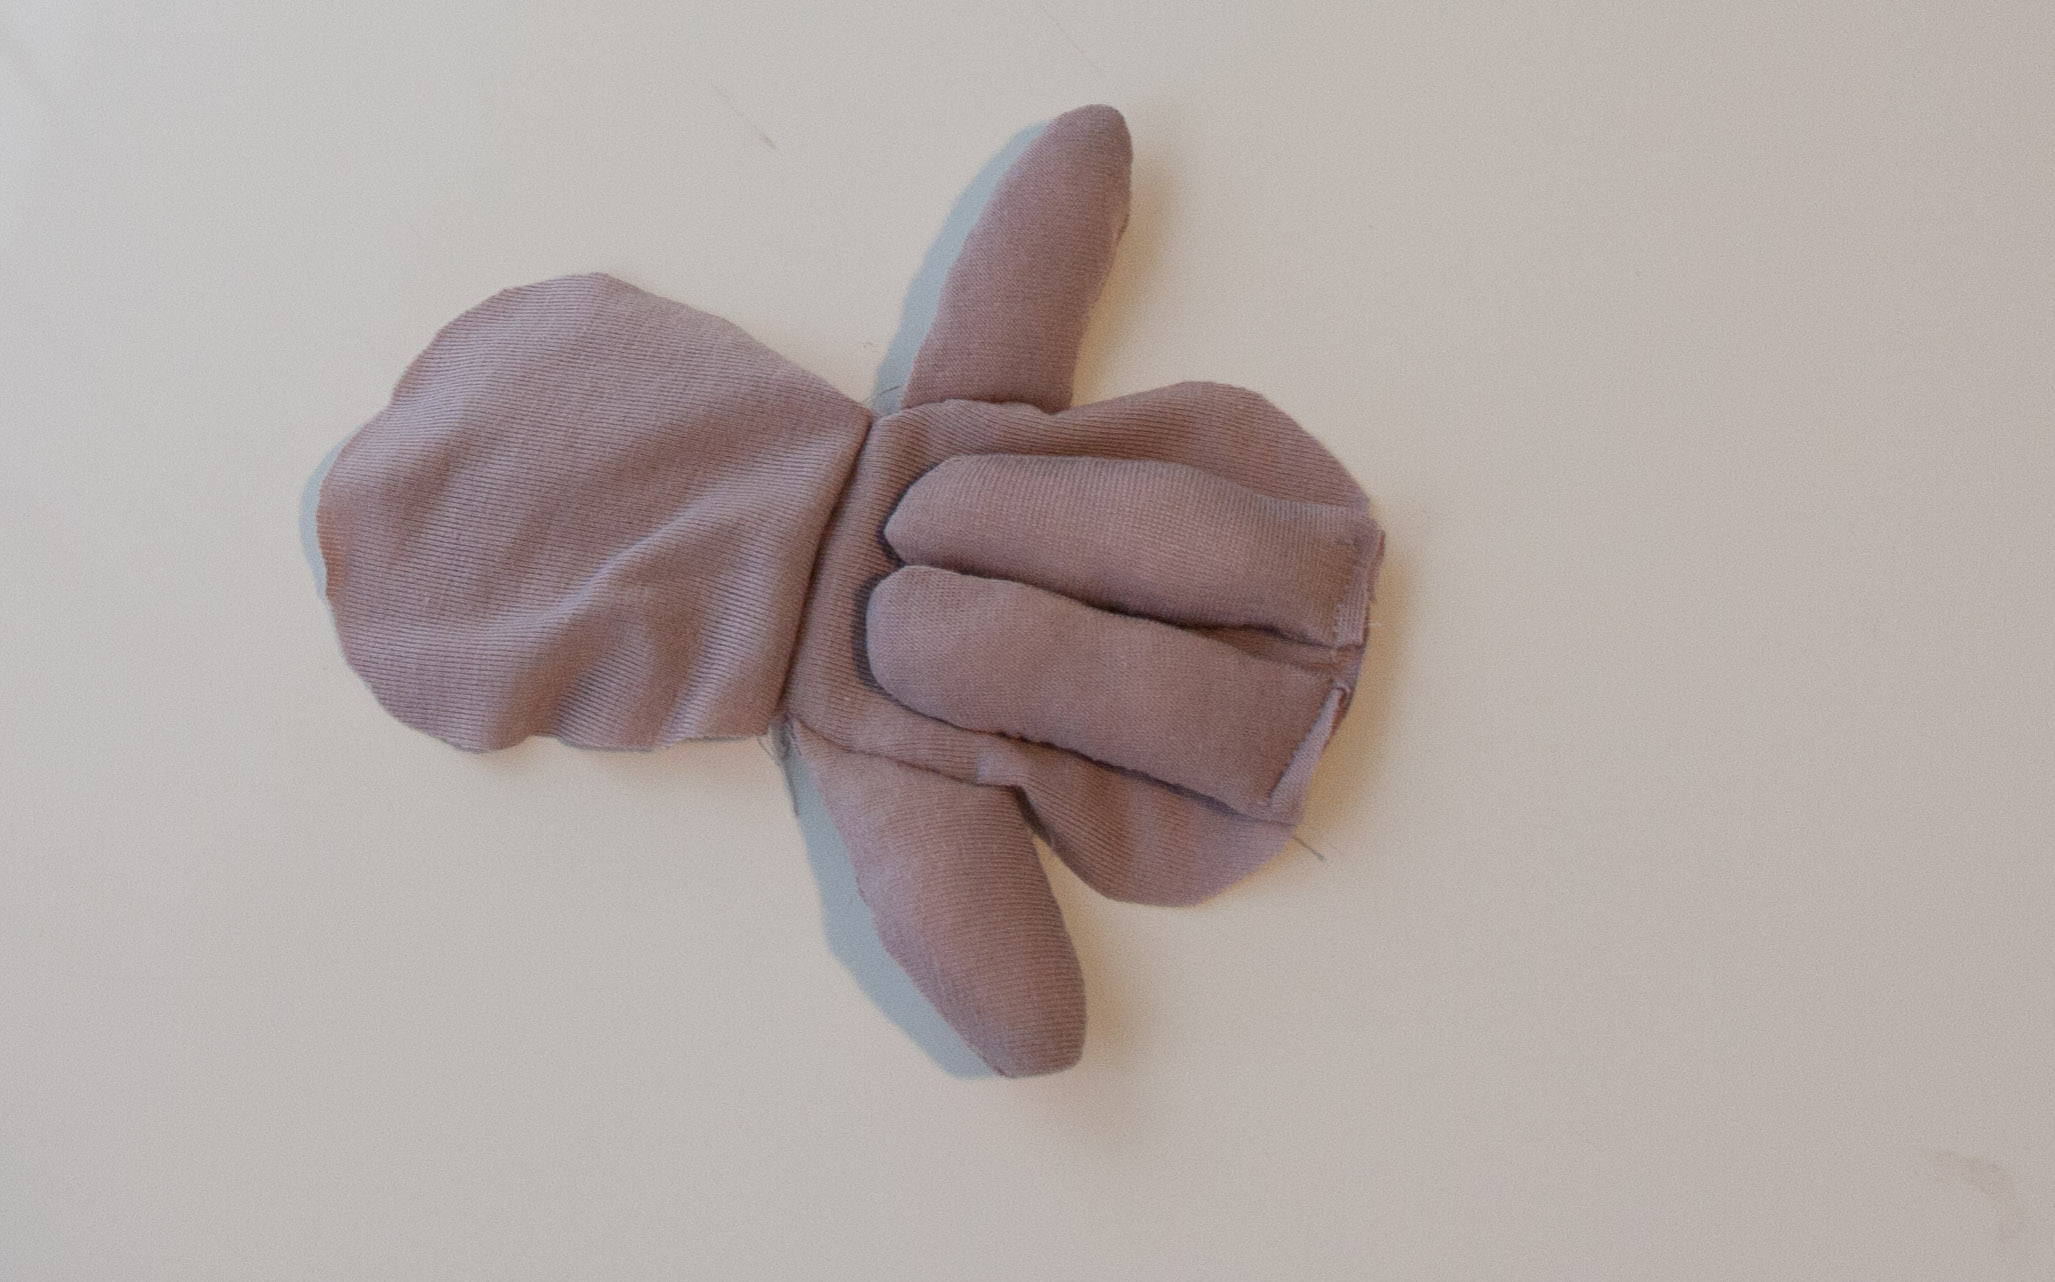
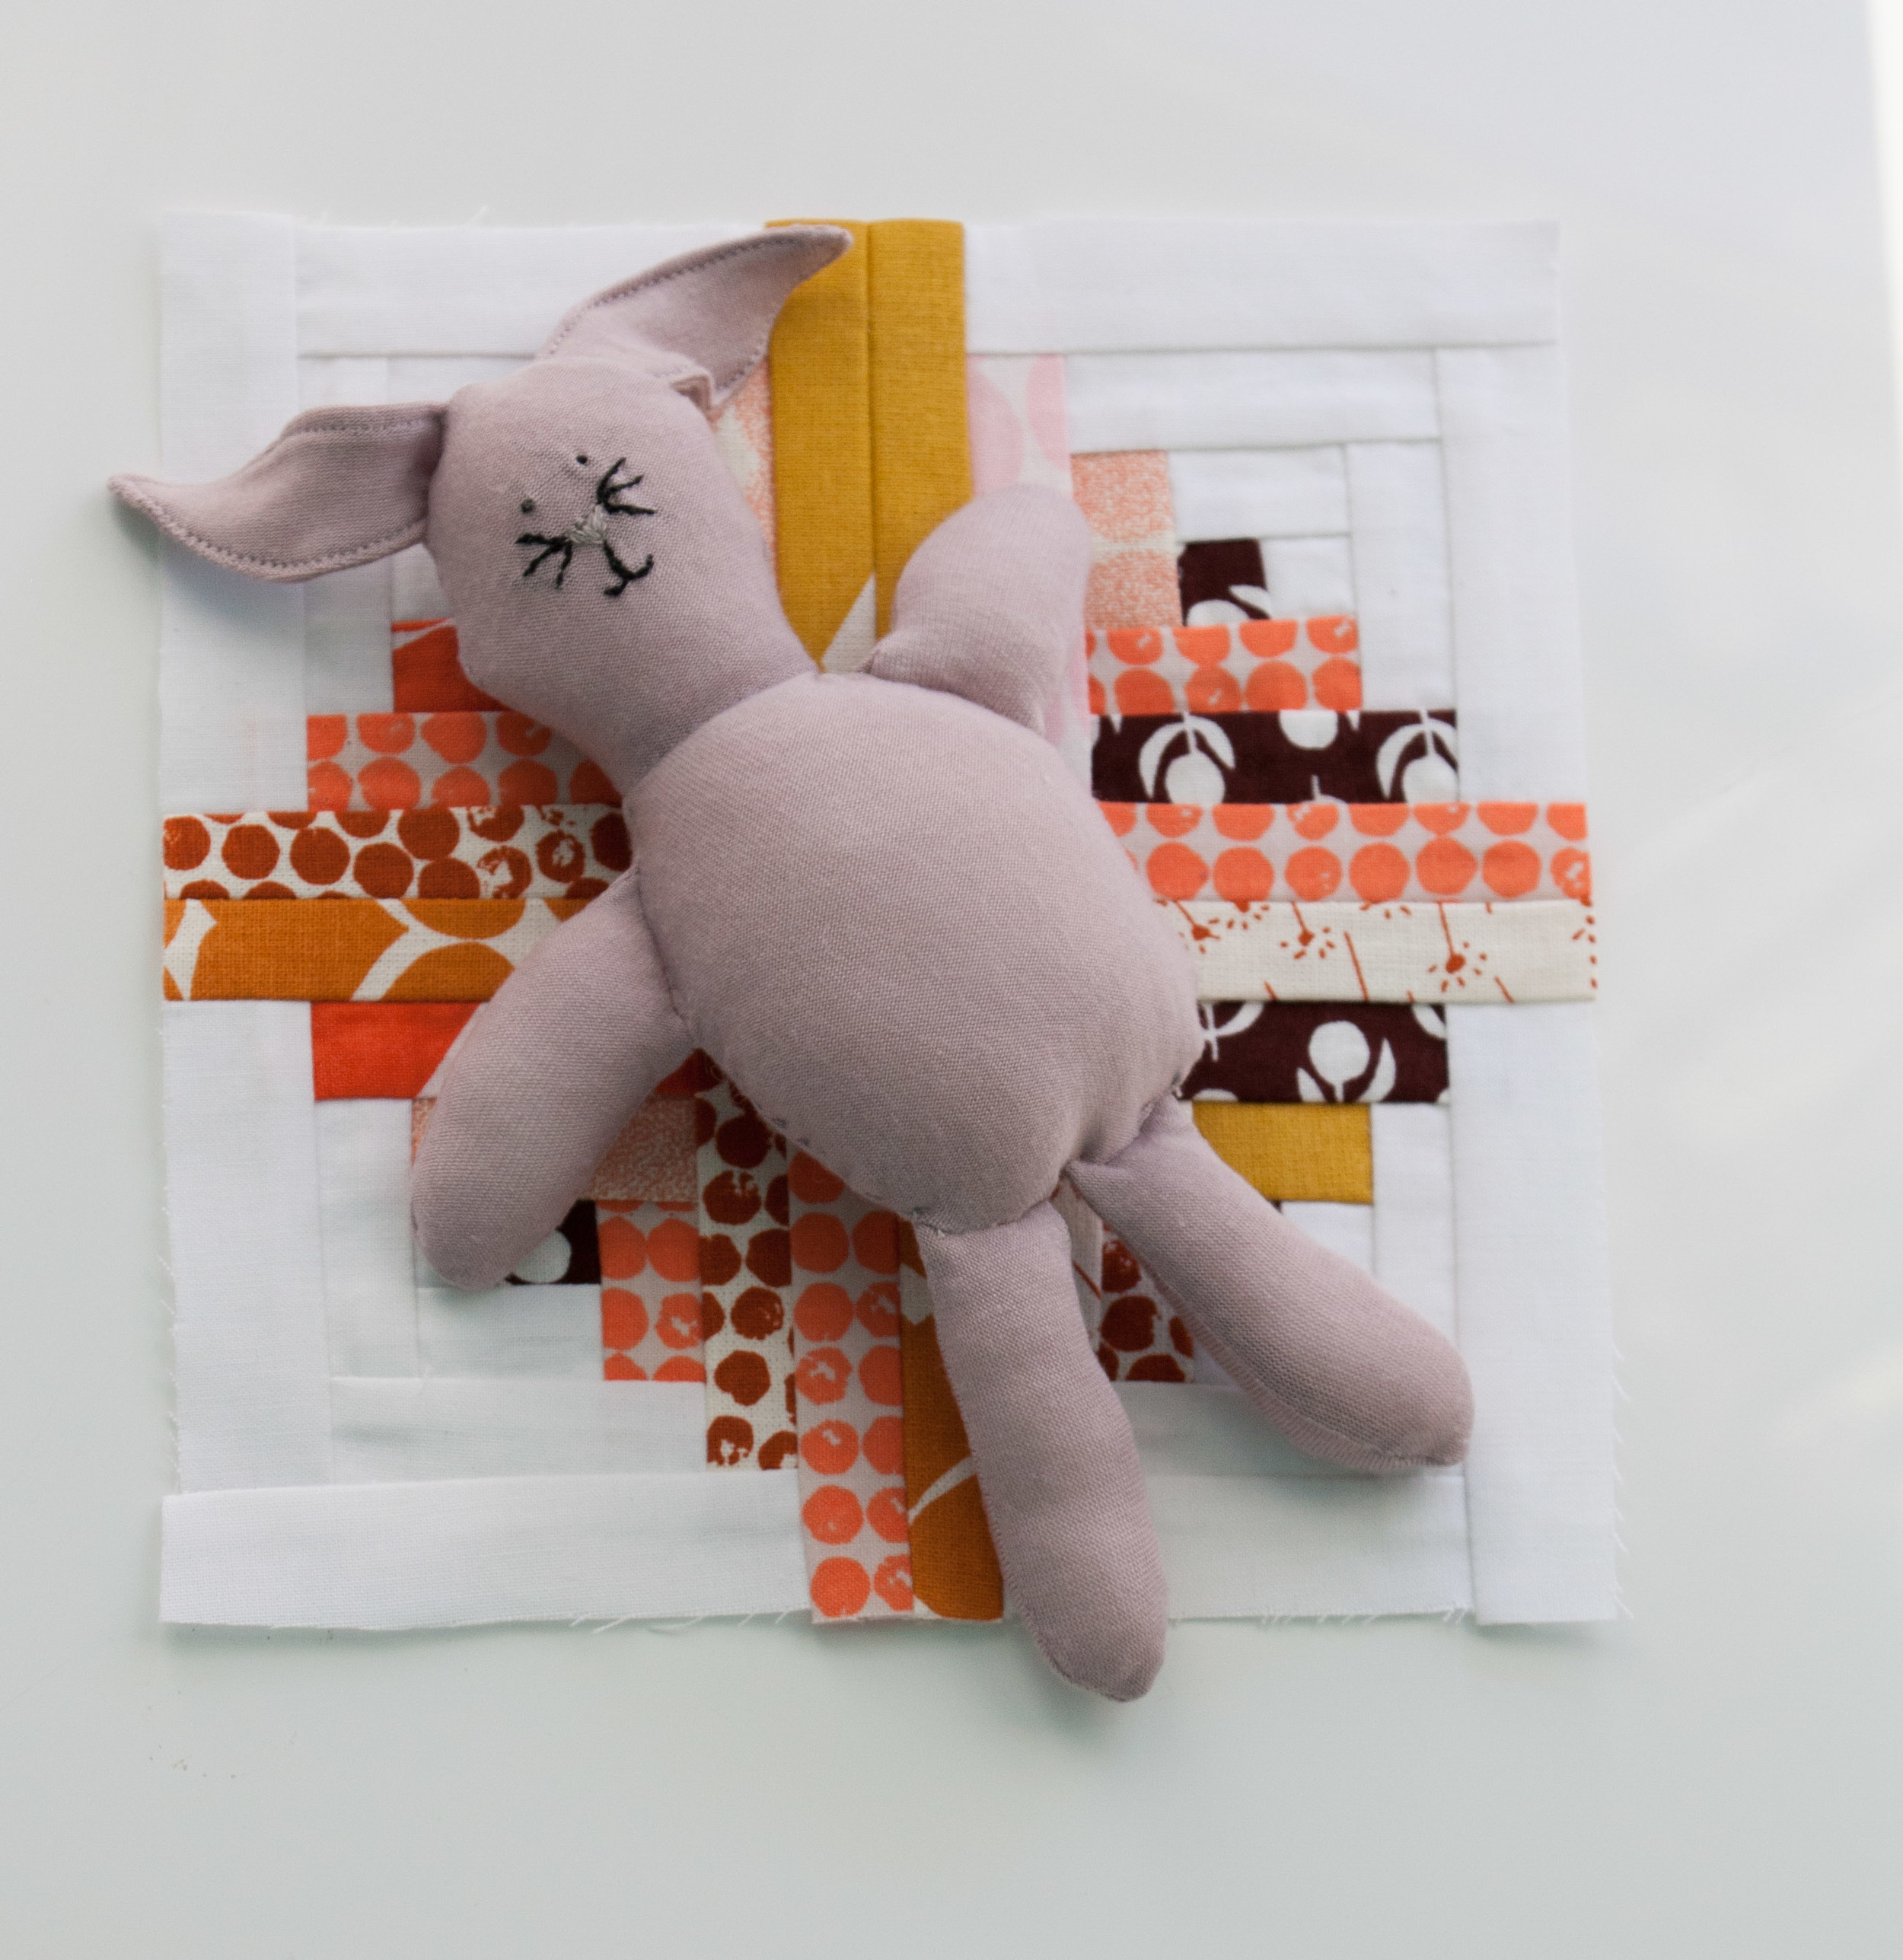
I guess hope springs eternal, because I gave knits another try on a small scale this spring when I made a rabbit softie. Sewing knits with a straight stitch went a lot better, so I took on a bigger project with with this receiving blanket.  It was still a simple project to be sure, but this is how we build skills and confidence, right?

I made this 36 inch square receiving blanket for a pregnant coworker who loooves giraffes. I ordered the fabric from Spoonflower. Isn’t it cute?

Organic Knit Receiving Blanket - Hooray for Rain

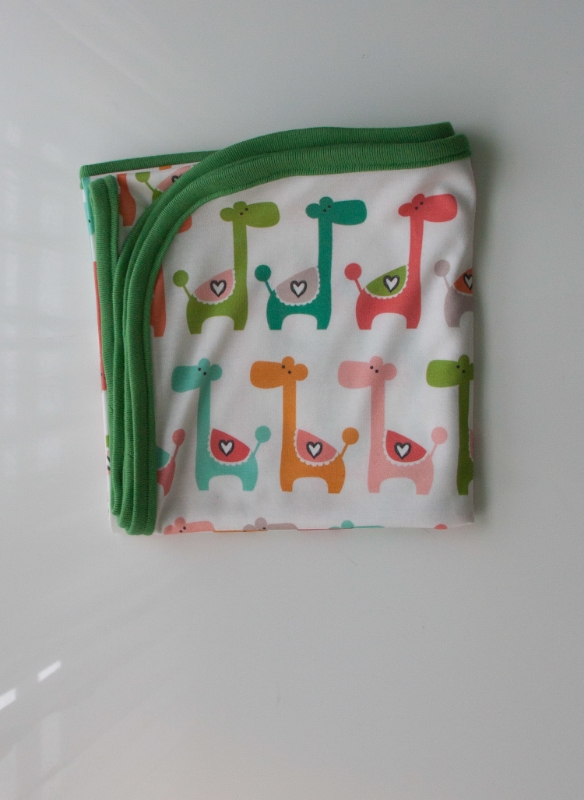
Spoonflower prints its organic cotton knit in 56 inch widths. I bought a yard and trimmed it to 36 inches square.  Then I used a plate to draw curves over the corners, and cut them down. (As I’ve mentioned a few times before, I am currently loving the look of curved corners.)

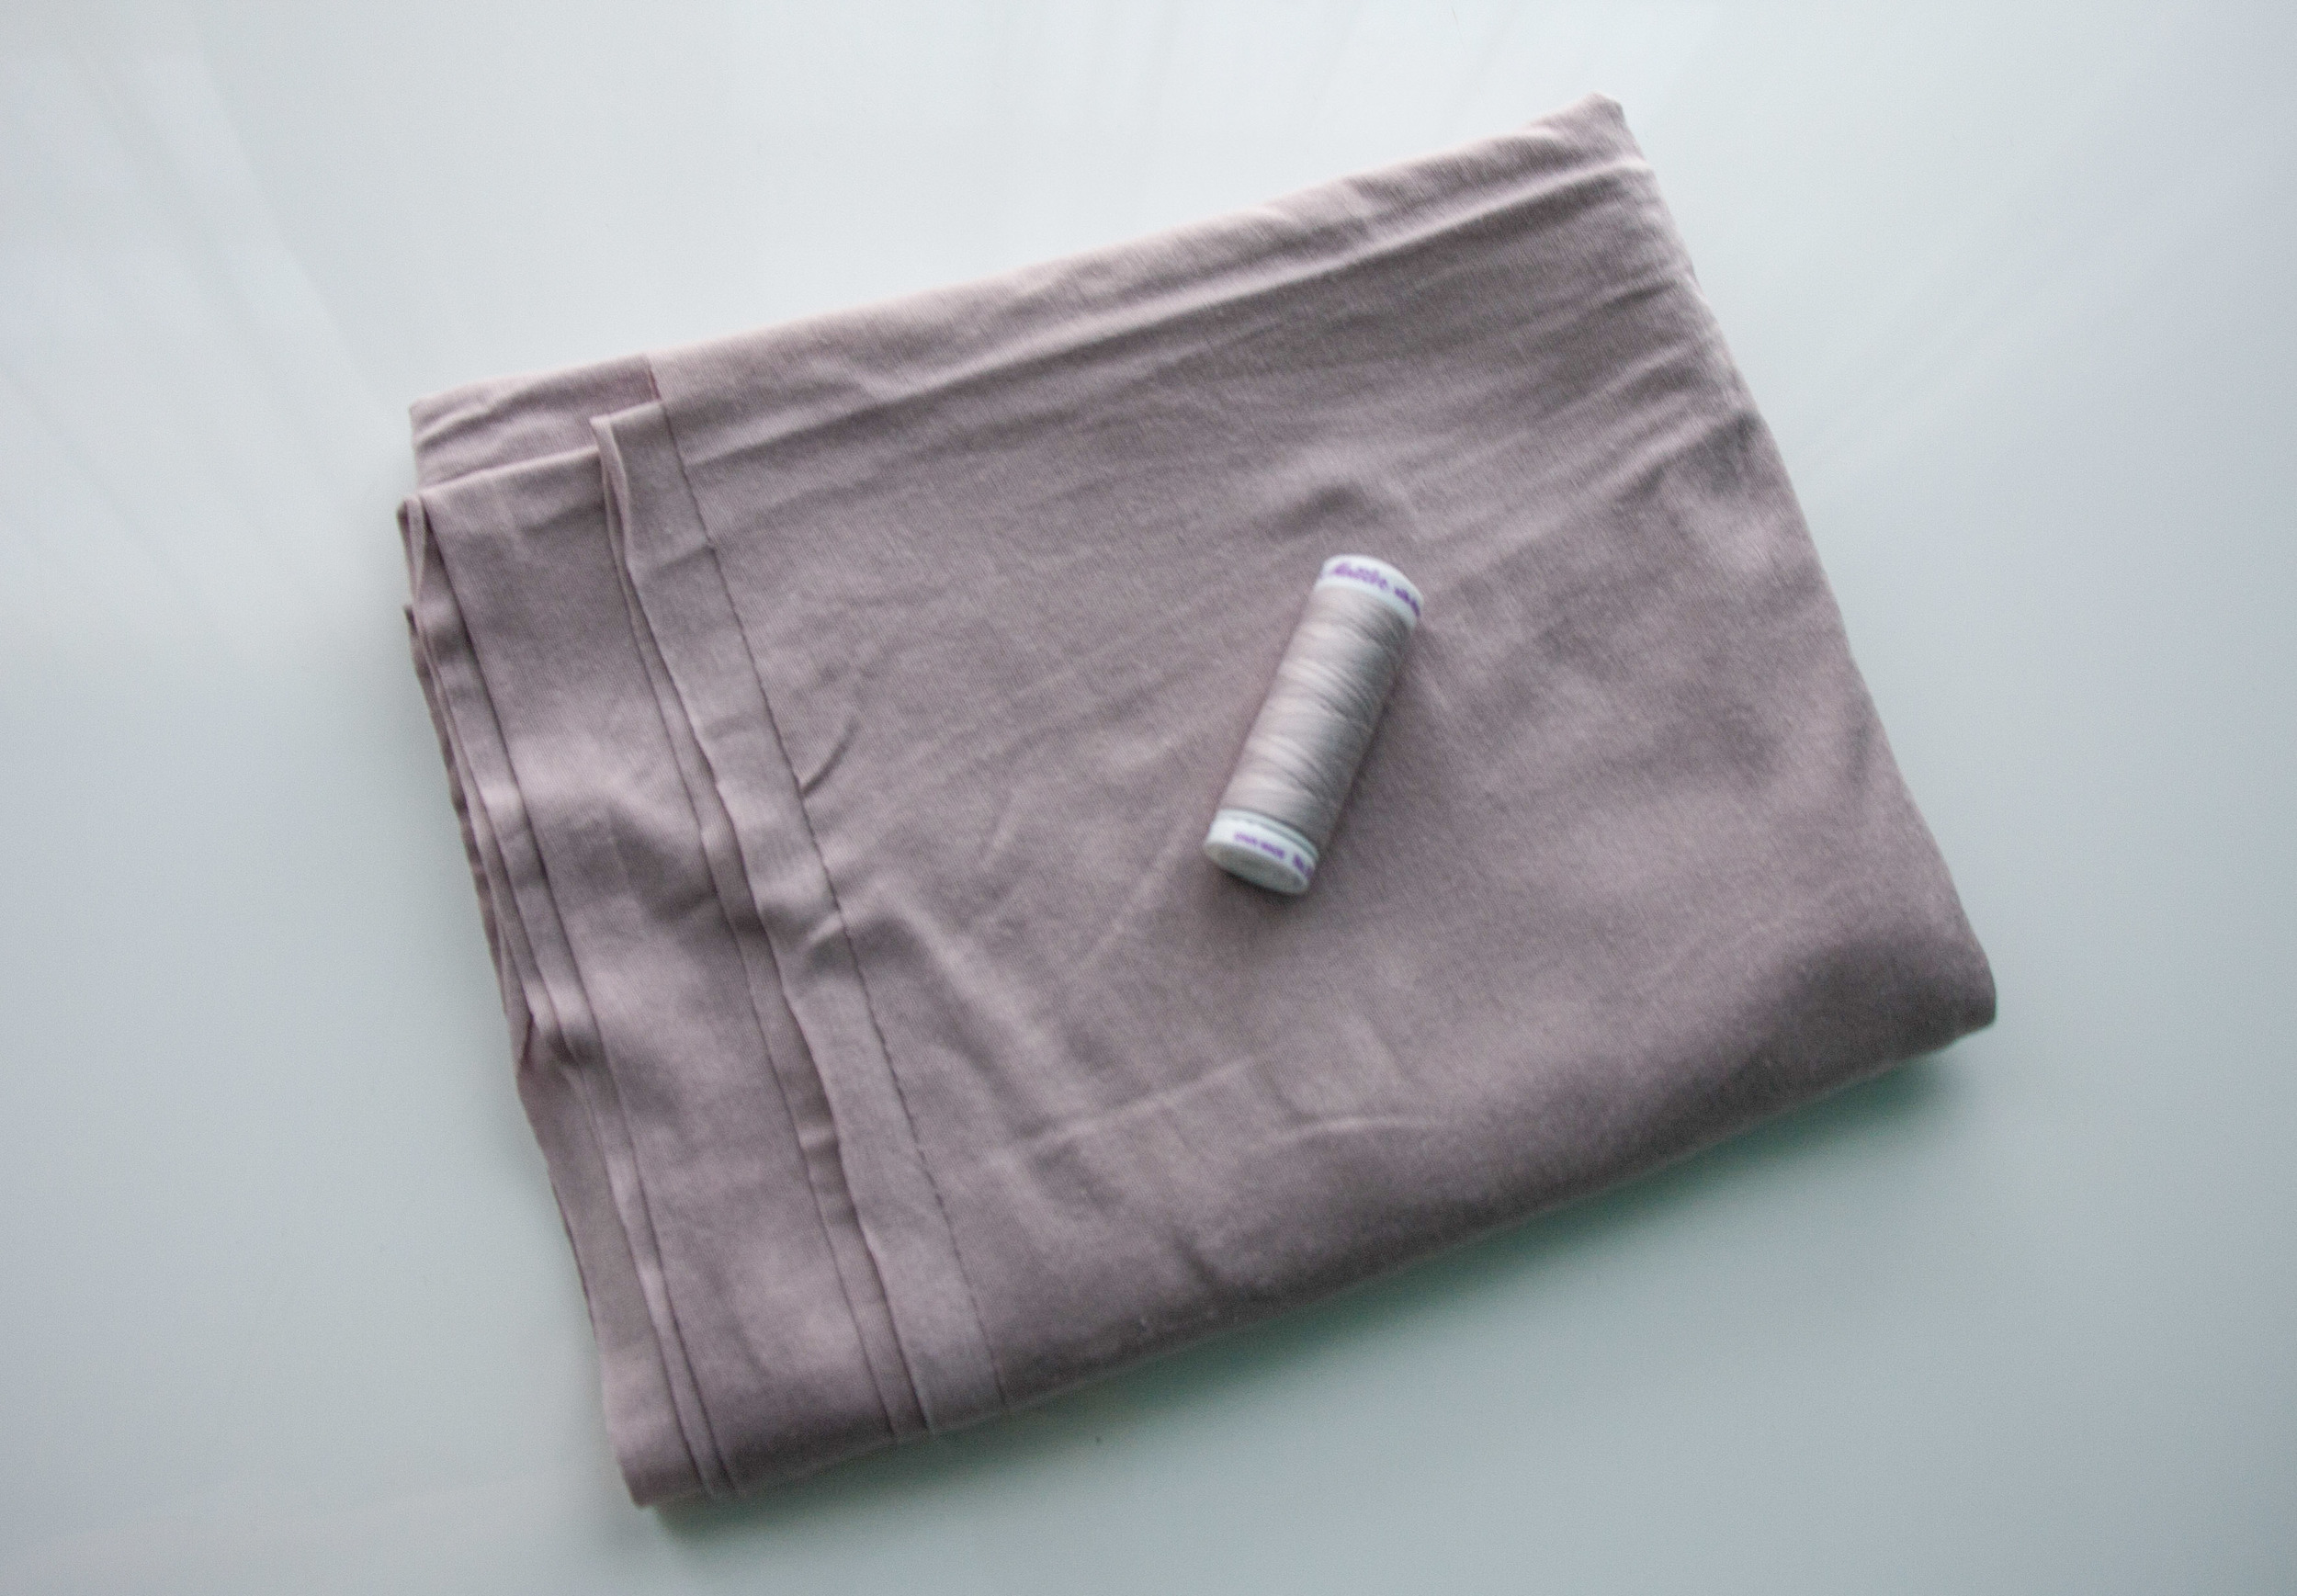
Curved corners are especially important for a knit blanket like this one, because it’s bound in double-fold binding, which would not work with traditional square corners. I made the double-fold binding with a stretchy ribbed knit from one of my local fabric stores, Bolt. I cut it into 2 ½ inch widths and stitched them together in one long piece. Then I pressed the long piece in half length-wise, and then opened it back up and folded the raw edges into the middle, pressed it again, and then folded it in half. Then I sandwiched the 36-inch square piece of knit fabric between the two halves of the ribbed binding, pinned it in place, and stitched it in place using coordinating thread.  

I had a significant amount of the giraffe print knit left over, so I bought some terry cloth and made some simple burp cloths to go with the receiving blanket. I took same-sized rectangles of the knit and terry fabrics and sewed around the edges with a half-inch seam allowance, leaving a small gap to turn the fabric right side out. After I turned the fabric out, I top-stitched a quarter of an inch around the edges to finish it off.

Knit Receiving Blanket and Burp Cloth - Hooray for Rain

Last but not least, I bought a super cool board book, Alpha Block, to go with the receiving blanket and burp cloths.

Sewing With Knits - Hooray for Rain

Maybe I'll try that pilot cap again sometime this winter. Third time is bound to be a charm, right?

A Happy Rainbow Children's Apron and a Curves Tutorial

Several years ago I took a break from quilts and became consumed with making aprons for a time. I made quite a few Emmeline aprons for various friends and family that year, including my friend Jodi. These days Jodi has a 5-year-old daughter K, who likes to wear Jodi’s apron whenever she helps with baking or frosting cookies, even though the apron is more than a few sizes too large!

After seeing adorable pictures of K practically swimming in Jodi's apron, I decided it was time that K had her own apron. The kid loooves rainbows, so that was a must. I went looking and quickly found Wonder Rainbows by Ann Kelle, which is just so cheerful and happy. The sweet pattern and vibrant colors make me feel nostalgic for my own childhood.

Hooray for Rain - Ann Kelle Wonder Rainbows

I wasn’t exactly sure how to size an apron for a 5 year old. I wanted to leave a little room to grow, and most of the patterns that I found for reference were geared towards 3-6 year-olds. I took a stab at sizing the apron up, and luckily it worked out just fine!

I decided to make K’s apron reversible, much like the Emmeline. I paired the Wonder Rainbows skirt with a Wee Wander Summer Night Lights panel by Sarah Jane for the bodice on one side.

Hooray for Rain - Wonder Rainbows and Wee Wander

On the other, I paired the Wonder Rainbows bodice with a skirt made of curved Kona solids, mimicking the Wonder Rainbows fabric. It’s been a few months since I sewed curves and it reminded me how much I love it!  

Hooray for Rain - Wonder Rainbows and Pieced Curves

I drew the curves on a piece of freezer paper cut to the size of the apron skirt.

Hooray for Rain - freezer paper curves

Then I cut out the curves, ironed them onto the fabric and cut them out, leaving a quarter-inch seam allowance.

Hooray for Rain - Quarter Inch Seam Allowance
Hooray for Rain - Prepped Curves

When you sew two curved pieces together, this is how you line them up. It felt counterintuitive when I was learning, but after I did it a few times it clicked.

Hooray for Rain - sewing curves together

When you start sewing, you want to keep the bottom piece lined up straight so that the fabric is parallel to your presser foot. Be careful not to tug too hard and stretch out the bias. You hold the top piece up so you can see what you’re doing while you keep the top and bottom edges lined up under the presser foot.

Hooray for Rain - Stitching Curves

Curves really are super fun. I highly recommend giving it a try if you are looking for a new challenge.

After sewing the apron pieces together I finished it off with some topstitching around the edges.

Hooray for Rain - Finished Apron Skirt

And this, of course, happened mid-project when I was trying to get some pictures. Oh kitty, you attention hog.

Last time I went on an apron making spree, I didn't quite finish all the aprons I had planned for my family and friends. Hopefully this is just the start of apron spree number 2!

Hooray for Rain - Finished Apron

DIY Pennant Pillow

Hooray for Rain - Pennant Pillow

Earlier this Spring I made this pennant pillow as a birthday gift for my friend and former roommate Virginia, better known in Bloglandia as the Heartographer. Despite her other fancy names she will always be Ginnie to me. Ginnie loves personalized things, turquoise blue, and piping, and a pennant pillow seemed like a fun way to combine all three!

Just like Mandi, who posted a great pennant pillow tutorial over on A Beautiful Mess, I have long admired Christine Schmidt's pennant pillow collaboration with Schoolhouse Electric. (I will admit that I love pretty much anything sold by Schoolhouse Electric. Each time I'm out in the industrial part of NW Portland I am tempted to stop and ogle everything in their showroom!)

I will generally explain my process below with some photos, but stop a bit short of a full tutorial since there is already a great one out there. The first thing I did was make a triangle template for the pennant out of freezer paper. Have you used freezer paper before? It is one of my very favorite crafty tools. One side is lightly waxed, which is AMAZING because you can iron it on to fabric temporarily without damaging your fabric.  Most grocery stores sell it for a few dollars a roll.

Hooray for Rain - pillow template.jpg

I backed both triangle pieces of gray cotton with iron-on fusible interfacing to make the fabric a little weightier.

Then I used a scrap piece of freezer paper to draw out my letters. I drew on the non-waxed side so that I could iron the letters directly onto the turquoise felt.

Hooray for Rain - making letter template.jpg

Here they are, ironed on and ready to be cut out!

Hooray for Rain - letters on felt.jpg

I used matching embroidery thread to stitch the felt letters onto the pennant.

Hooray for Rain - felt letters

Next I made my piping. This was my first foray into piping. I relied on this great tutorial. The most important lessons I learned about making piping are:

  • Cut the fabric you will use to cover your piping cord on the bias so it bends nicely around corners.
  • The bias strips of fabric should be two times the width of your piping cord plus two times your desired seam allowance.
  • Giving yourself a seam allowance of at least 3/8" is handy for turning those corners.
  • You'll need to switch to a zipper foot or similar and move your needle as far over as it will go to make a tight seam for your piping.
Hooray for Rain - making piping

I sewed the piping on the front of the lettered side of the pillow, overlapping it where the ends met.

Hooray for Rain - piping sewn on.jpg

Then I pinned the right sides together and sewed around the perimeter, taking care to sew right on top of the stitching line from the piping. I left a gap on the bottom of the pennant to turn the pillow right side out.

Hooray for Rain - Right sides together

Another tip is that when you are sewing the piping on, it is okay to cut the end point of the pennant a bit short in order to nicely make the turn with the piping. If I hadn't done so, the long skinny point might not have turned nicely when I flipped the pennant right side out.

Hooray for Rain - unstuffed pillow.jpg

It's official! I've caught the pillow making bug. And piping adds such a nice luxe touch! I see many more handmade pillows in my future.

Hooray for Rain - finished pennant pillow

Rabbit Softie and Petal Skirt Tutorial

Hi friends! I'm back today with a tutorial on how to make the rabbit and petal skirt from my Umbrella Prints 2014 Trimmings Competition entry. By the way, have you seen the rest of the competition entries? If not, you should take a look, because they are amazing and completely inspiring. 

Let's get started with the rabbit!  I made the rabbit out of some really soft blush colored jersey I bought from Girl Charlee Fabrics. Old t-shirt or legging material typically works great too.

The first thing I did was draw my pattern. I had to tinker with it a little bit, but these were my finished pieces. There is a link at the end of this post with all of the template pieces you need to make a rabbit and petal skirt.

I cut the paper pattern pieces out, and then traced the following onto the jersey with my disappearing ink pen:

  • two head pieces
  • four ear pieces
  • two body pieces
  • four arm pieces
  • four leg pieces

Then I cut all of the pieces out. Already kinda cute!

The first pieces I sewed together were the ears, arms and legs. First I sewed two pieces of each respective limb together, leaving the base of the appendage open. I sewed them with a scant quarter of an inch seam allowance. Here's one of the arm pieces.

Next I turned all of the appendage pieces right side out, using a pair of tweezers to help pull each one through its opening. Jersey is a stretchy fabric, which makes it easy to turn small pieces. Yay!

The next step is to top stitch around the ears, 1/8 of an inch or less from the edges. Then, in preparation for embroidering the rabbit's face, I sewed the ears on to one of the head pieces, aligning the base of the ears with the top of the front of the face, and taking just a few stitches to hold them in place.

I also attached the body piece to the head piece with a 1/4 inch seam allowance to give myself more to hold on to as I embroidered the face.

I do not profess to be an expert at embroidery, but Mollie of Wild Olive sure knows her stuff, so I encourage you to visit her tutorials on embroidery basics if you want to learn more.

Next I stuffed the arms and legs and set them aside.

Then I sewed the head pieces together, right sides facing each other, and ears tucked in. I started and stopped stitching at the head/body junctions to give myself plenty of room to attach those chubby arms.

After sewing the head pieces together, I flipped up the top layer of the body and pinned the arms to the bottom layer of the body. Make sure that you position the arms facing in on top of the body when you line up the arm raw edges with the raw edge of the body. Otherwise, when you turn your rabbit right side out, the arms will be facing the wrong way!

Hooray for Rain - rabbit arms pinned in place.jpg

Once your arms are properly positioned and pinned, take a few stitches against the bottom layer of fabric to secure them in place. Then repeat with the legs.

Now, flip the upper body layer back down and secure a few pins, if you want, before you sew the body together. It's not going to look super pretty at this point. Those arms and legs are chubby and will need to get squished together in order to fit inside so that you can sew around the body. Yet another opportunity to be thankful that jersey is so stretchy!

Before you start stitching the body, take a minute to plan where you are going to leave an opening to turn your rabbit right side out. I like to leave the opening between an arm and a leg. Start at the head/body junction on one side, where your stitches left off when you sewed the head pieces together. Stitch down over the arm attachment, and around and over both leg attachments. Stop after both legs are secured, and backstitch a few. Now start back up at the other head/body junction and stitch down over the remaining arm attachment, and backstitch a few. Yay, you are almost done!

You have left yourself an opening in order to turn your rabbit right side out. Do it with a little bit of care. Jersey is forgiving, but you wouldn't want to pull an arm or leg seam loose after all your hard work!

Now you get to stuff your rabbit. I used Poly-Fil, but you can use whatever you want. The stretchier your material is, the more, ahem, overstuffed your rabbit may appear. The last step is to sew up the opening. I like to use a ladder stitch.

Hooray - your soft and wibbly rabbit is complete!

And now we move on to the petal skirt! I started with this brown floral piece of trimming, which was the longest piece I had left. It was about six inches long and one inch wide. I pressed the seams to the inside so the finished width would be half of an inch. It just so happened that my well-stuffed rabbit was just under six inches around. I'd recommend measuring the circumference of your rabbit and adding 1/2 inch for seam allowances when making your petal band.  

Hooray for Rain - petal skirt band.jpg

The template for the fabric petals is located in the template file at the end of the post. A six inch long band takes six petals. I traced the petals onto my trimmings and cut them out.

I had a few scraps of interfacing around, and I decided to use them to help turn the seams of the petals. I sewed the petals right sides together with the interfacing, trimmed the excess interfacing, and turned the petals right side out.

Hooray for Rain - petals.jpg

Then I pinned and hand stitched the petals to the band, just because I was feeling fussy and didn't want machine stitches to show on the bright white flowers.

The petal skirt is finished by placing the ends right sides facing each other, sewing a 1/4 inch seam allowance, and flipping the skirt right side out. Voila!

Here is the file with the template pieces for both the rabbit and the petals for the skirt.

If you make your own rabbit and/or petal skirt, please send me the pictures, I'd love to see your creations!

2014 Umbrella Prints Trimmings Competition

Do you know about the Australian fabric company Umbrella Prints? Their fabric is so lovely! Gorgeous vibrant colors, and modern yet classic patterns.  Earlier this spring I was perusing the Umbrella Prints website and learned about their annual Trimmings Competition. Umbrella Prints trimmings are sweet little packages of "offcuts" from when the fabric is printed...or in other words scraps! My favorite!

The goal of the competition is to make something, anything out of the trimmings. I loved the blue package - after all, at least half of my fabric stash is blue...but I was also very drawn to the Earth trimmings. Just look at those pink, red and orange hearts! I decided to branch out of my usual blues, and the Earth trimmings package arrived at my door about two weeks later. Aren't these trimmings pretty?

I had SO much fun creating a little home for a rabbit out of my trimmings package. Here's my finished project!

In addition to my Earth trimmings package, I began with a set of three suitcases from Land of Nod.

I used the largest suitcase for the rabbit house. The first thing I added was some pretty gold hexie vellum. 

Next, I made my rabbit out of soft pink/blush jersey.

And every good rabbit deserves a soft quilt to sleep under, right?

Hooray for Rain - log cabin quilt strips.jpg

It was a little nerve wracking to cut into the trimmings! I made a log cabin quilt out of one-inch wide strips of various lengths.

Hooray for Rain - log cabin quilt top.jpg

Finished mini quilt top!

These little scraps were left over from my quilt cuttings. Perfect for making tiny bunting!

Hooray for Rain - bunting_.jpg

Other scraps transformed into a rug and the top to a night stand.

Hooray for Rain - rug.jpg

And the rabbit received a vibrant petal skirt.

At this point my remaining trimmings were dwindling.

I turned a few scraps into fabric frames for pictures of tiny animal friends, which were from old Madison Park, Rifle, and Petit Collage catalogs that were going to be recycled.

With the rest of the scraps I made pillows, curtains, and an apron on a tiny hanger. A few more wall decorations, forget-me-nots in a vase, and the rabbit's room was furnished!

Hooray!

Hooray for Rain - rabbit in room.jpg

I'll put out a tutorial for the rabbit and the petal skirt in a later post.

I had such a blast making the rabbit's room. I am really happy that Umbrella Prints came up with this incredible idea to send their trimmings out into the world and eliminate waste. There is something so satisfying about creating something out of little scraps of fabric. I can't wait to see all the other amazing trimmings competition entries!